In order to configure a camera the following settings can be carried out:
- Define description of the camera’s location
- Activate / deactivate recordings
- PTZ-Configuration
- Define storage time of recordings
- Define camera network data
- Configuration of camera type (Axis, Mobotix, Panasonic, Sony, etc. )
- Image Size
Optionally the image size should be set if the values are known.
- Threshold for motion detection
This function increases or decreases the sensitivity threshold to activate motion detection.
- Fast Motion Permanent Recording
Besides motion detection it is possible to create a permanent recording. This mode generates a movie with images that are recorded in the given interval.
This interval shows when a picture is taken. If you want a real-time recording, set for example the interval to „1 second“. This means that every second a new image is recorded.
- Recording length of time-lapse recordings
This parameter defines the length in time after a new recording will be started for time-lapse recordings. If set to Hourly each hour a new recording will be generated.
- Number of images Pre-Event
In motion or event detection mode, sets the number of frames recorded pre-event.
- Number of images Post-Event
In motion or event detection mode, sets the number of frames recorded post-event.
- Frames per second (fps) in motion detection mode
This defines the number of images per second during the recording with motion detection. Please select this parameter carefully. The interval can be set between 1 frame every 3 seconds up to 25 frames per second. You must be careful how high the maximum number of frames per second can be supplied by the camera. If the camera can supply up to 5 frames per second, then C-MOR isn´t able to record in a higher interval.
Please keep in mind that a too high number of frames with a very high resolution can overload the system.
- Rotation of Image
The cam can be installed at an angle of 0, 90, 180 or 270 degrees and this function allows the orientation of the viewed image to be rotated for normal viewing. A 180 degrees recording makes e.g. sense in case the cam is installed on the ceiling down sided.
- Maximum Time of recording for Motion Detection
Sets a limit to how long recording takes place in Motion or Event Detection mode irrespective of whether the event that triggered the recording still exists or not.
- Recording Mode
The recording mode switches between motion detection and permanent recording (not time-lapse). When the permanent recording mode is activated, motion is no longer detected and not individually recorded (no more alarming is possible!). The duration of the recordings have the length which is set for motion detection.
- Display Frame around changed Pixels
This parameter defines whether a frame will be displayed around changed pixels. This is very helpful in case the threshold for the motion detection for the cam image is defined.
- Display the Number of changing Pixels
This feature shows the number of changing pixels in the top right corner of the video. This parameter is very useful when optimizing motion detection parameters.
- Display Text with time and date in cam image
Feature for the activation and deactivation of the display of time and date in the cam image.
Note
Emails are only generated when Email-Alarm is activated here.
- Automatic email alarm during Motion Detection
Feature for the activation and deactivation of the email alarm in case motion has been detected by the cam. A plain text email will be sent (excluding image or movie attachment).
- Email address for alarm emails
This is the email address alarm mails are sent to.
Please note: in case of a lot of motion and many recordings that are effected during motion detection your mailbox might reach its storage limit very fast and cannot receive emails anymore!
- Attach Motion Detection recordings to alarm email
This feature enables video images to be attached to the event email alert.
- Mobile device compatible Email attachments
Enable this feature if email attachments are sent to a mobile device.
- Direct Cam Link
Network Cams might be linked directly over C-MOR. This setting is needed when network cameras are not located at the same location and are only accessible behind a router through the internet.
- Text on left side in cam picture
This optional text will show up in the left lower corner of the camera picture. If this field is empty no text will be shown.
- Text Size in videos
The text in the camera picture can be shown in sizes seletable from 1 to 10. This is useful for big pictures or special usage of the pictures.
- Web camera picture quality
This value defines the video quality in percent for the data transfer of the camera picture to C-MOR. The default value is 50%. Changing this parameter may cause a high system load which can cause system failures.
Note
This affects only the display. The video will still be recorded in full quality
- JPEG image quality
This setting defines the quality of the JPEG images stored on C-MOR. The default value is 100% – highest quality.
- Time between two events
Time in seconds without motion after a new motion movie is recorded.
- Automatic camera image quality (bitrate)
This feature automatically adjusts the quality of the image transferred from the video camera to C-MOR. A value of 2 represents the highest image quality and requires the most storage capacity. Higher values reduce data storage capacity requirements by decreasing the image quality.
- Manual bitrate for recordings
This feature manually sets the quality of the image transferred from the video camera to C-MOR manually. A value of 9999999 represents the highest image quality and requires the most storage capacity and bandwidth. Lower values reduce data storage capacity requirements by decreasing the image quality. This value should not set lower than 200000. This value is only active if the automatic value above is switched off (value 0).
If your image is recorded distorted in the lower area, this may be due to the bit rate. Correct the value Bitrate of the image transmission from the camera from 2 to 0. Then set the value of the manual bit rate to 8 000 000. If the distorted strip increases reduce the manual bit rate. If it is smaller, increase the value to a maximum of 9 999 999.
You may have to experiment with different values until the bottom area is displayed correctly.
- Minimum number of pictures with changes for Motion Detection
The number of pictures with changes to detect motion. The value 1 is capable in the most cases. This means only one picture is compared to detect motion.
- Sudden light intensity
This feature defines the percentage of the total video image area that has to experience a sudden light intensity change before triggering a recording event.
- Number of ignored Lightswitch Frames
The number of frames in sudden light indicates how many camera frames should be ignored in serial not triggering motion detection. This value is ignored if sudden light intensity is set to 0%.
- Noise
Noise in the camera picture can lead to erroneous motion detection. With this parameter failures in motion detection are reduced.
- Live view – fps
This setting configures the fps rate in live view mode. The higher the frame ratethe higher the internet bandwidth requirement. This setting does not affect the fps rate in motion/event or permanent recording mode.
- Use keep-alive signal for the camera connection
This parameter forces C-MOR to use a keep-alive technology to communicate with the camera. If the parameter ‘force’ is selected an existing socket connection will be re-used if this feature is supported by the camera. This setting is also necessary for compatibility with various IP cameras.
- Number of Frames per Second in Live view
This setting configures the fps rate in live view mode. The higher the fps rate the higher the internet bandwidth requirement. This setting does not affect the fps rate in motion/event or permanent recording mode.
- Use TCP when selected RTSP connection
This parameter configures whether the communication to the camera takes place with TCP instead of UDP if the stream protocol ‘RTSP’ was selected.
- Reduce stream speed in C-MOR Web Interface
This parameter lowers the stream speed in the C-MOR Web Interface while no motion is detected to 1 frame per second. This parameter is very effective when using the preview or downloading video recordings. Once motion is detected the stream is accelerated to the set value.
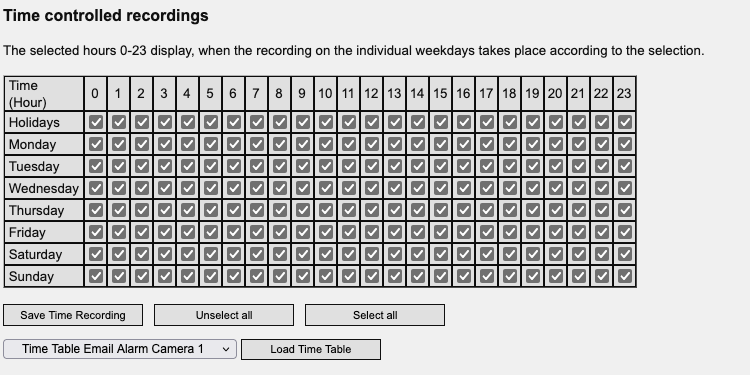
- Time-controlled recordings
Setting of hour and day per week when recordings have to be carried out. This applies e.g. when recordings should only be carried out during nighttime at a store.

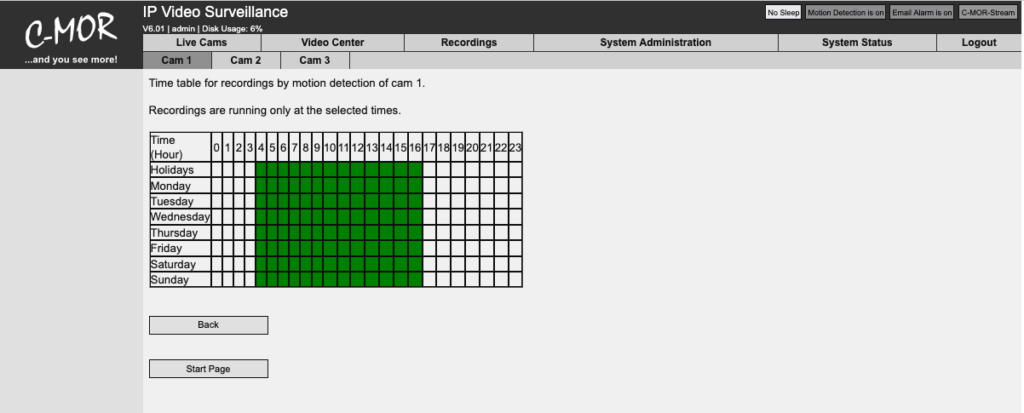
- Time-controlled motion detection
Definition of hour and day per week motion detection should be carried out.
- Time-controlled alarm emails
Define weekdays and hours in which alarm emails are sent.
- Transfer of timescale
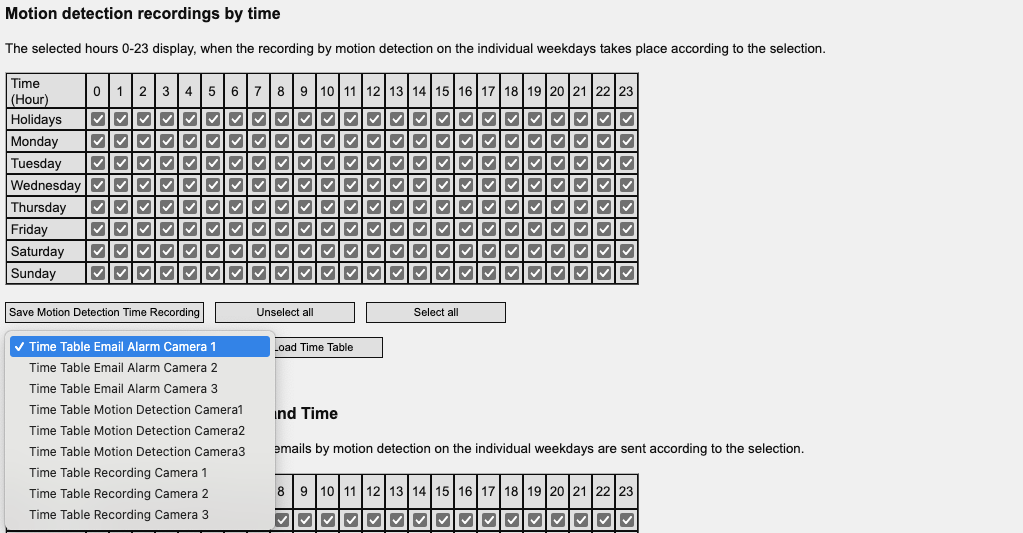
Every timescale, even if time-controlled motion detection or time-controlled alarm emails is able to transfer to another timescale. Therefore, you have to choose a timescale and commit your selection with „Load Time Table”:

If you want for example your camera 3 with the same settings like your camera 1, so you have first go to the configure site for your cam 3.

With help of the drop-down menu you can choose the timescale you want. For example choose the „Time Table Motion Detection Camera 1”:

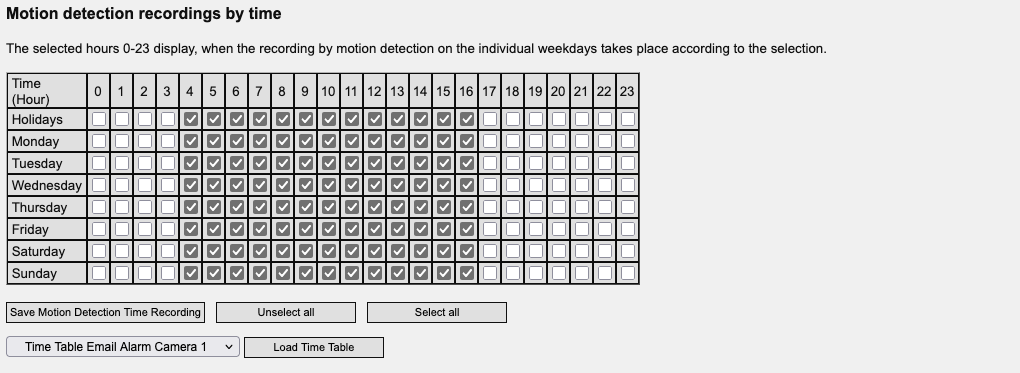
Now you have to confirm your selection by clicking in „Load Time Table”, you can see that the settings are transferred:

Now you have to click on the button „Save Motion Detected Time Recording” to save it:

- Holidays Configuration
C-MOR offers the option to define holidays. Holidays are days which need a special time table configuration. All time tables have a row holidays. These holidays are configured here. C-MOR will not use the weekday configuration if the current day is a defined holiday.

- Configuration of camera event for network alarms
Recordings by C-MOR can be triggered by the use of external switches (special accessories) that report events over your network. Here it is necessary to use an IP switch, which is sending messages to C-MOR via the so-called syslog service. This will then start a recording for the selected camera.
- Image mask for the definition of the area of motion detection
In case motion should not be detected within the complete camera image the area where motion should be detected (white area) can be defined by a black & white mask. The defined black area will not trigger motion detection. The size of the image mask has to be identical to the size of the camera image.
- Link to the camera direct access
The button „Cam Administration” leeds you to the web interface of the selected camera.
General Information about motion detection:
Motion detection carried out by C-MOR is based on differences in the respective camera image and not due to conventional motion detectors (exception: special accessory external switch). Motion detection can also be affected by changes in light.